

DIY Reversible Easter Decor
It seems like Easter has come early this year! If your house isn’t already decked out in Easter decor, use this tutorial to make a family of easter bunnies.
This tutorial will use the other side of the ghost decor provided last Halloween.

Ghost reverses to Easter bunny
Skill Level: Novice
Estimated Time: 2 hours
Materials Needed:
Ghost decor from last Halloween
Hot glue
Paint (white and black)
Elastic
Safety pins
Burlap ribbon with white lace overlay
Spring-colored ribbons
Hot glue
Raffia
Small round wooden ball beads with a drilled hole
Steps for Reversible Easter bunnies:
Paint wood - if you hadn’t already painted the other side of the ghost, paint the reverse side white before doing anything else
Glue nose - For each bunny, hot glue the wooden bead with the drilled holes facing left/right in the center for the bunny nose
Paint face- Using black paint (or a Sharpie) add the oval eyes and a mouth underneath the nose
Add raffia whiskers- string a couple pieces of raffia through the wood bead to act as whiskers. Use hot glue to keep it in place.
Measure elastic - Wrap elastic around the wooden bunny and cut it to size. It should be snug so it will stay in place. You can sew the ends together or just use a safety pin.
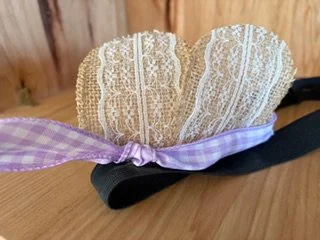
Cut ribbons- Cut the burlap ribbon with a white lace overlay to be the size and shape of bunny ears. Also cut your spring-colored ribbons and tie in a knot for the bunnies hairbows.
Glue ears and hair bow to elastic - Hot glue the hair bow tied into a knot to the front of the ears, and then glue it all to the top of the elastic.
Attach removable ears to the bunny
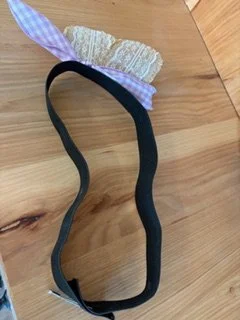
Elastic for the removable ears
Adhere the rabbit ears and ribbon to the elastic
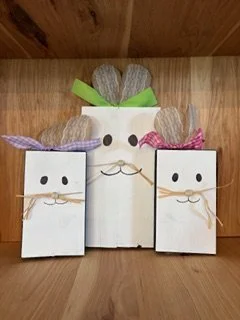
Completed Easter bunny family
Et voila! When Halloween comes back around, you can turn these bunnies to the side with ghosts.